Hiding Sensitive Articles on Your GitHub Pages Blog
- EN
- ZH-CN
Table of Contents
#
Background
How can you prevent others from seeing certain articles in your blog that is hosted by GitHub Pages?
This guide offers a strategy to host websites on GitHub Pages while keeping sensitive content private.
The solution involves using two separate GitHub repositories:
Private repo
blog-src: Holds the source code of your website.Public repo
blog.github.io: For the generated static website.
This approach ensures sensitive content remains private in blog-src. Upon each commit to blog-src, an automated process builds the static site and pushes it to blog.github.io, updating your public website without exposing restricted content (See Fig.1).
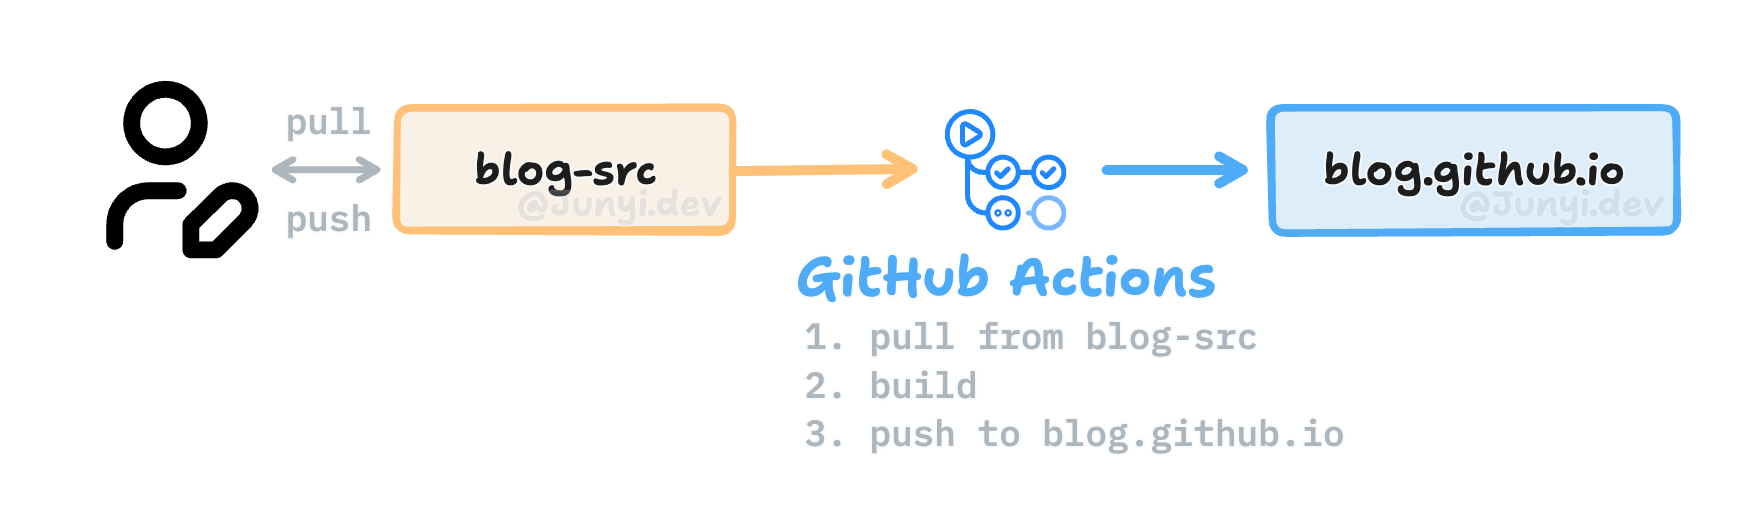
blog-src automatically builds the site and synchronizes it to blog.github.ioLet’s take a look at how to achieve this.
#
Step 1. Create a personal access token
Going to this page (Settings ➜ Developer Settings ➜ Personal access tokens)
Generate new token (classic)
Check all “repo” and “workflow”. (See Fig.2)
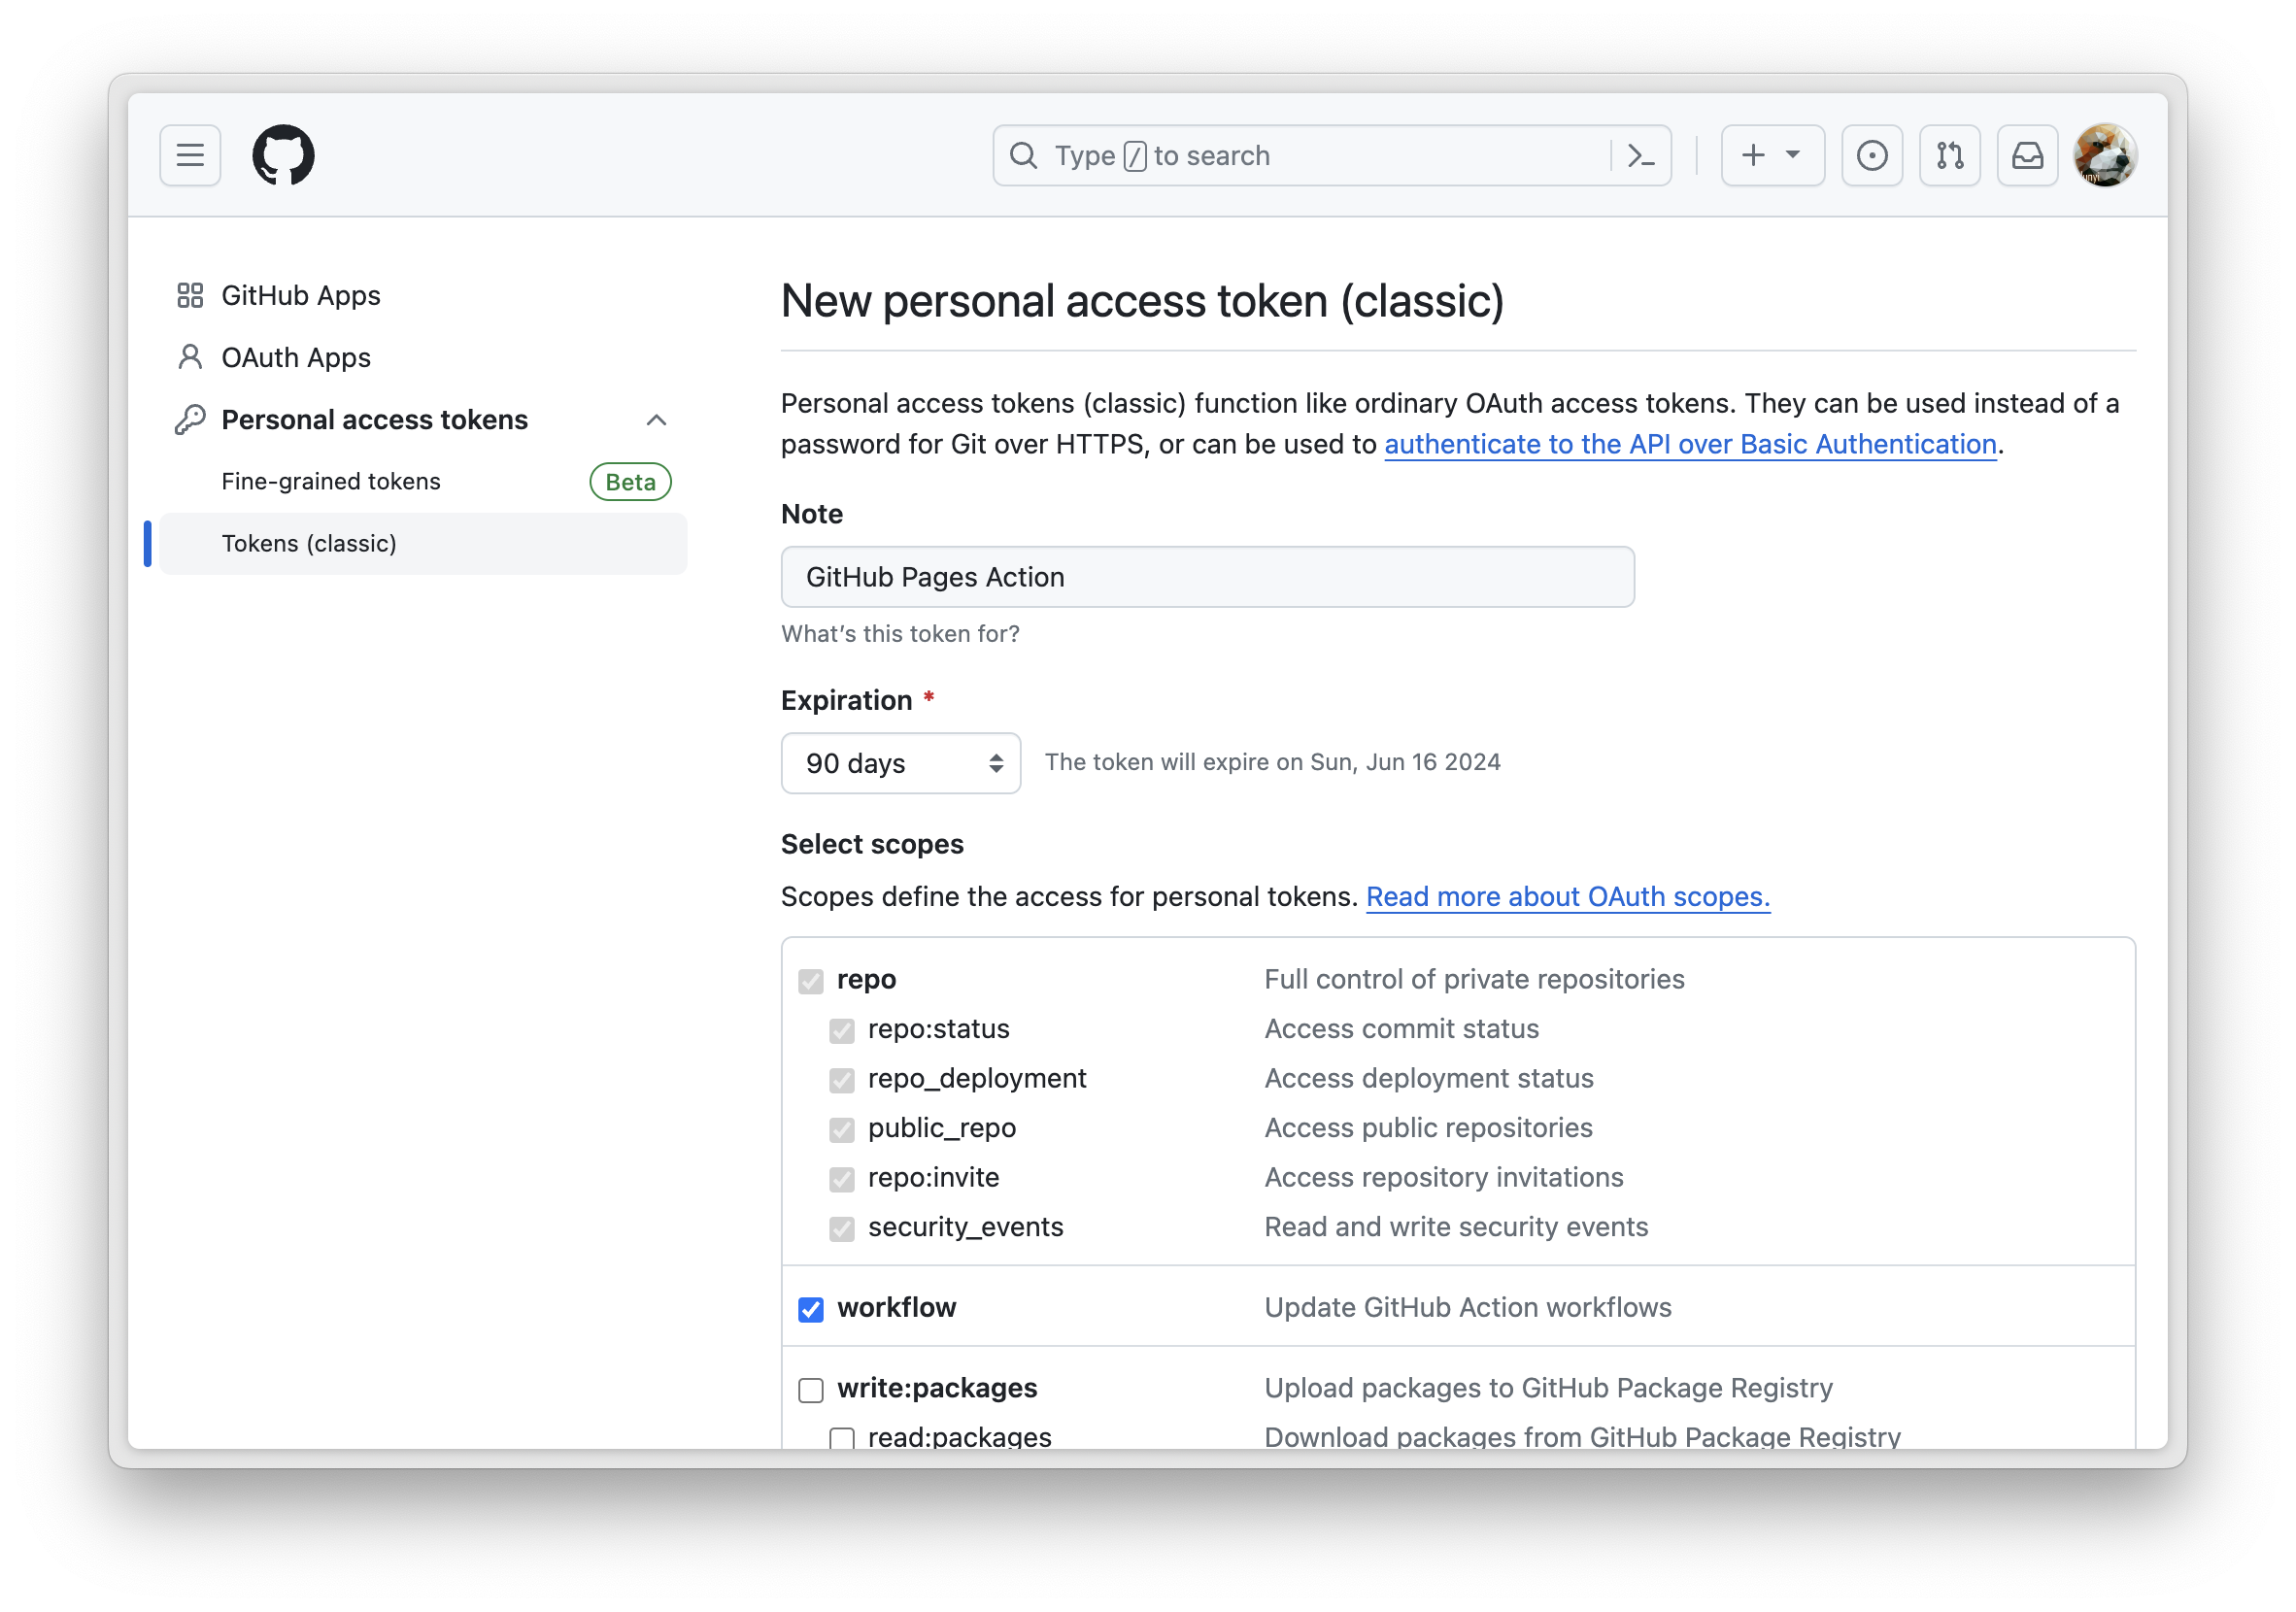
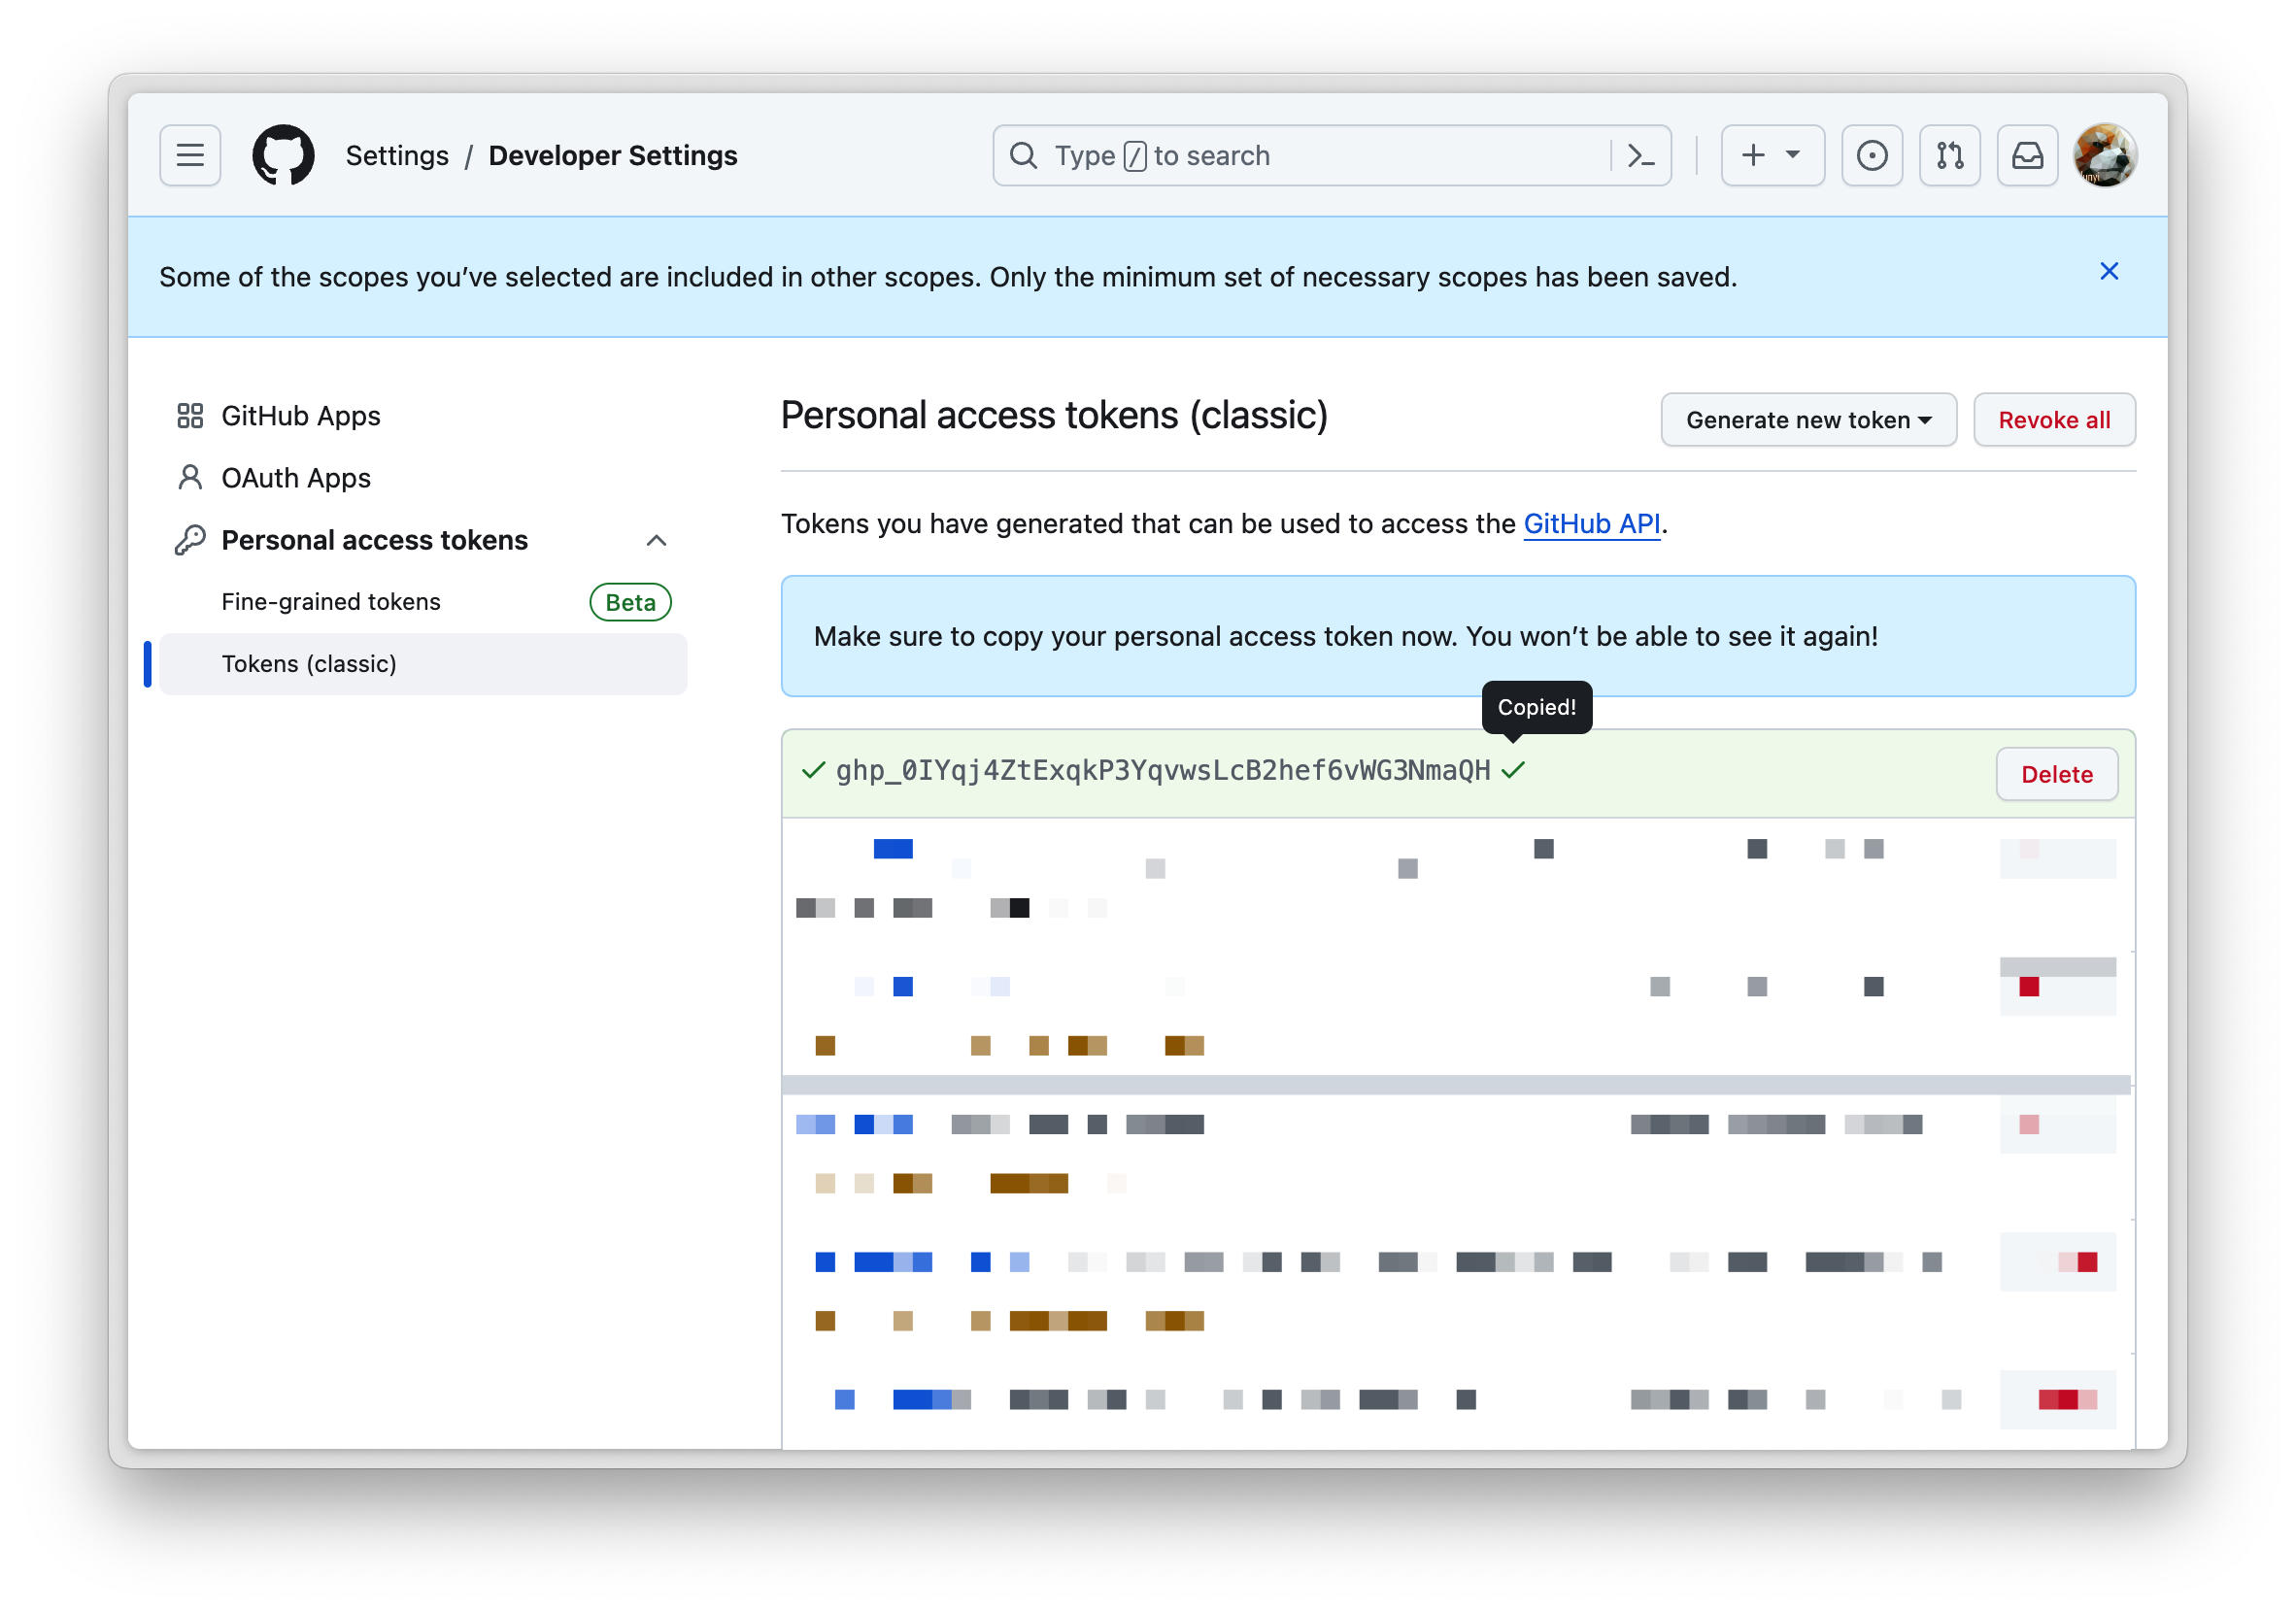
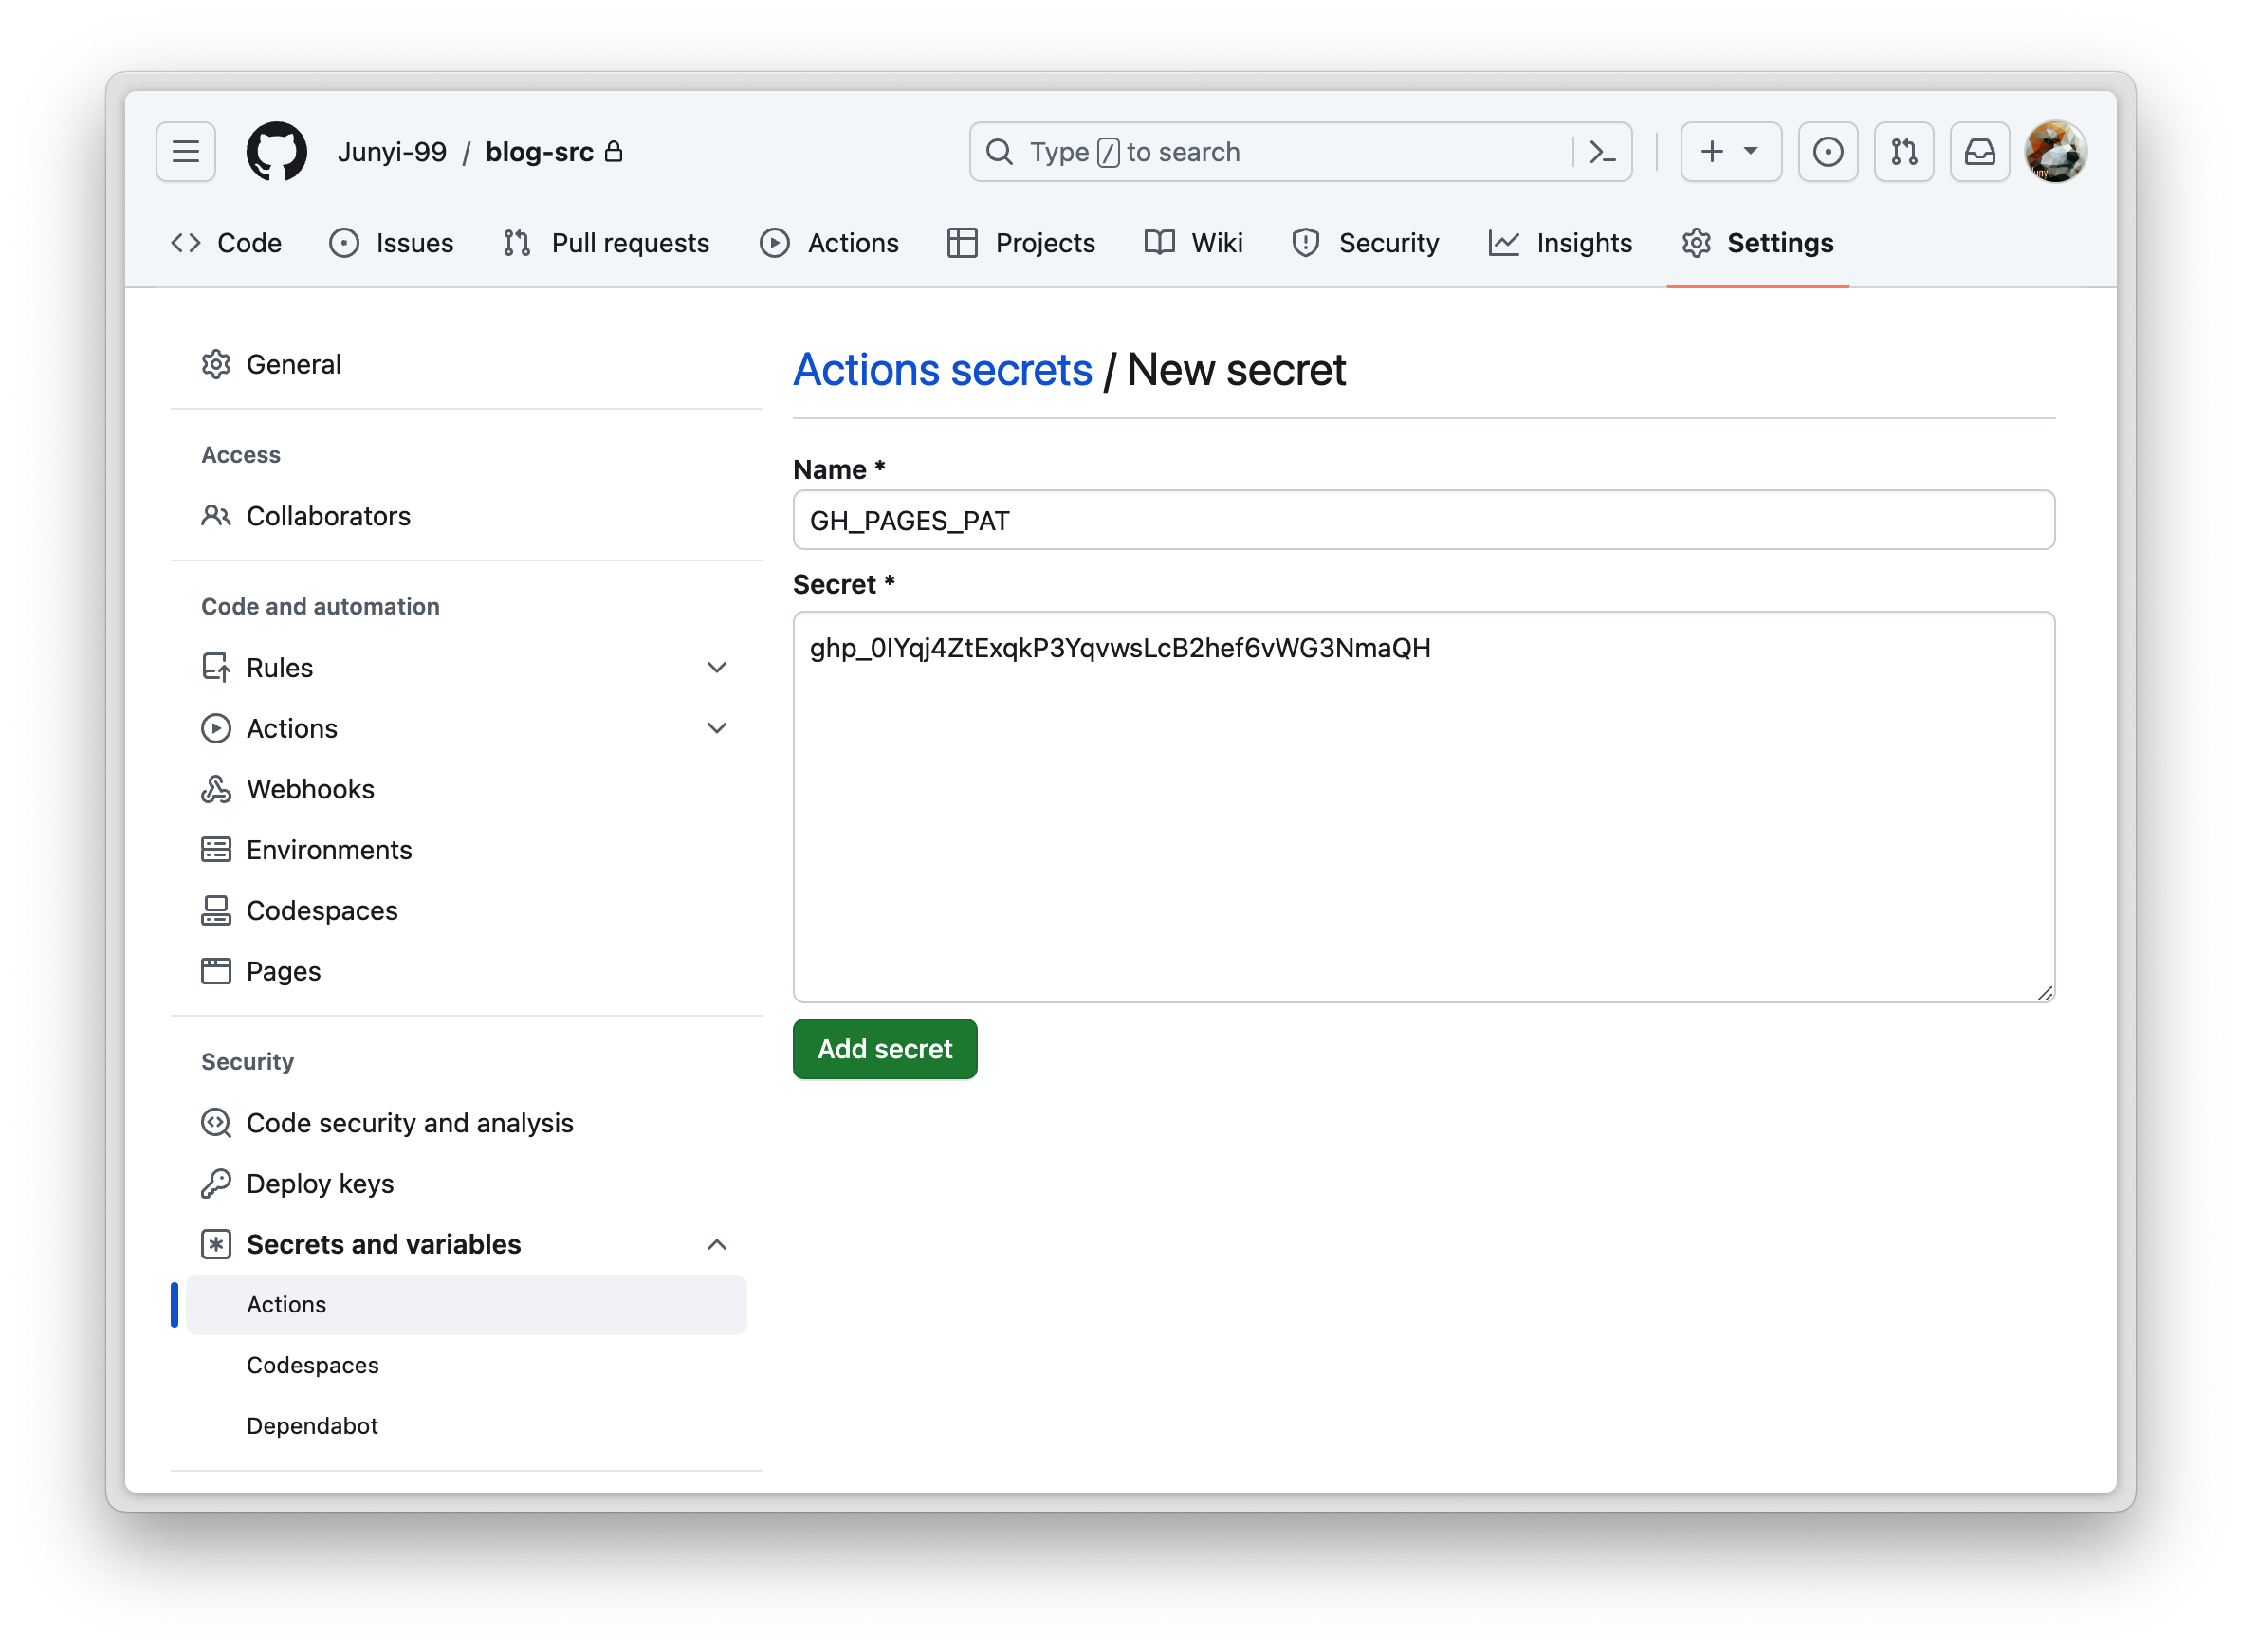
Copy the token, for example 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
#
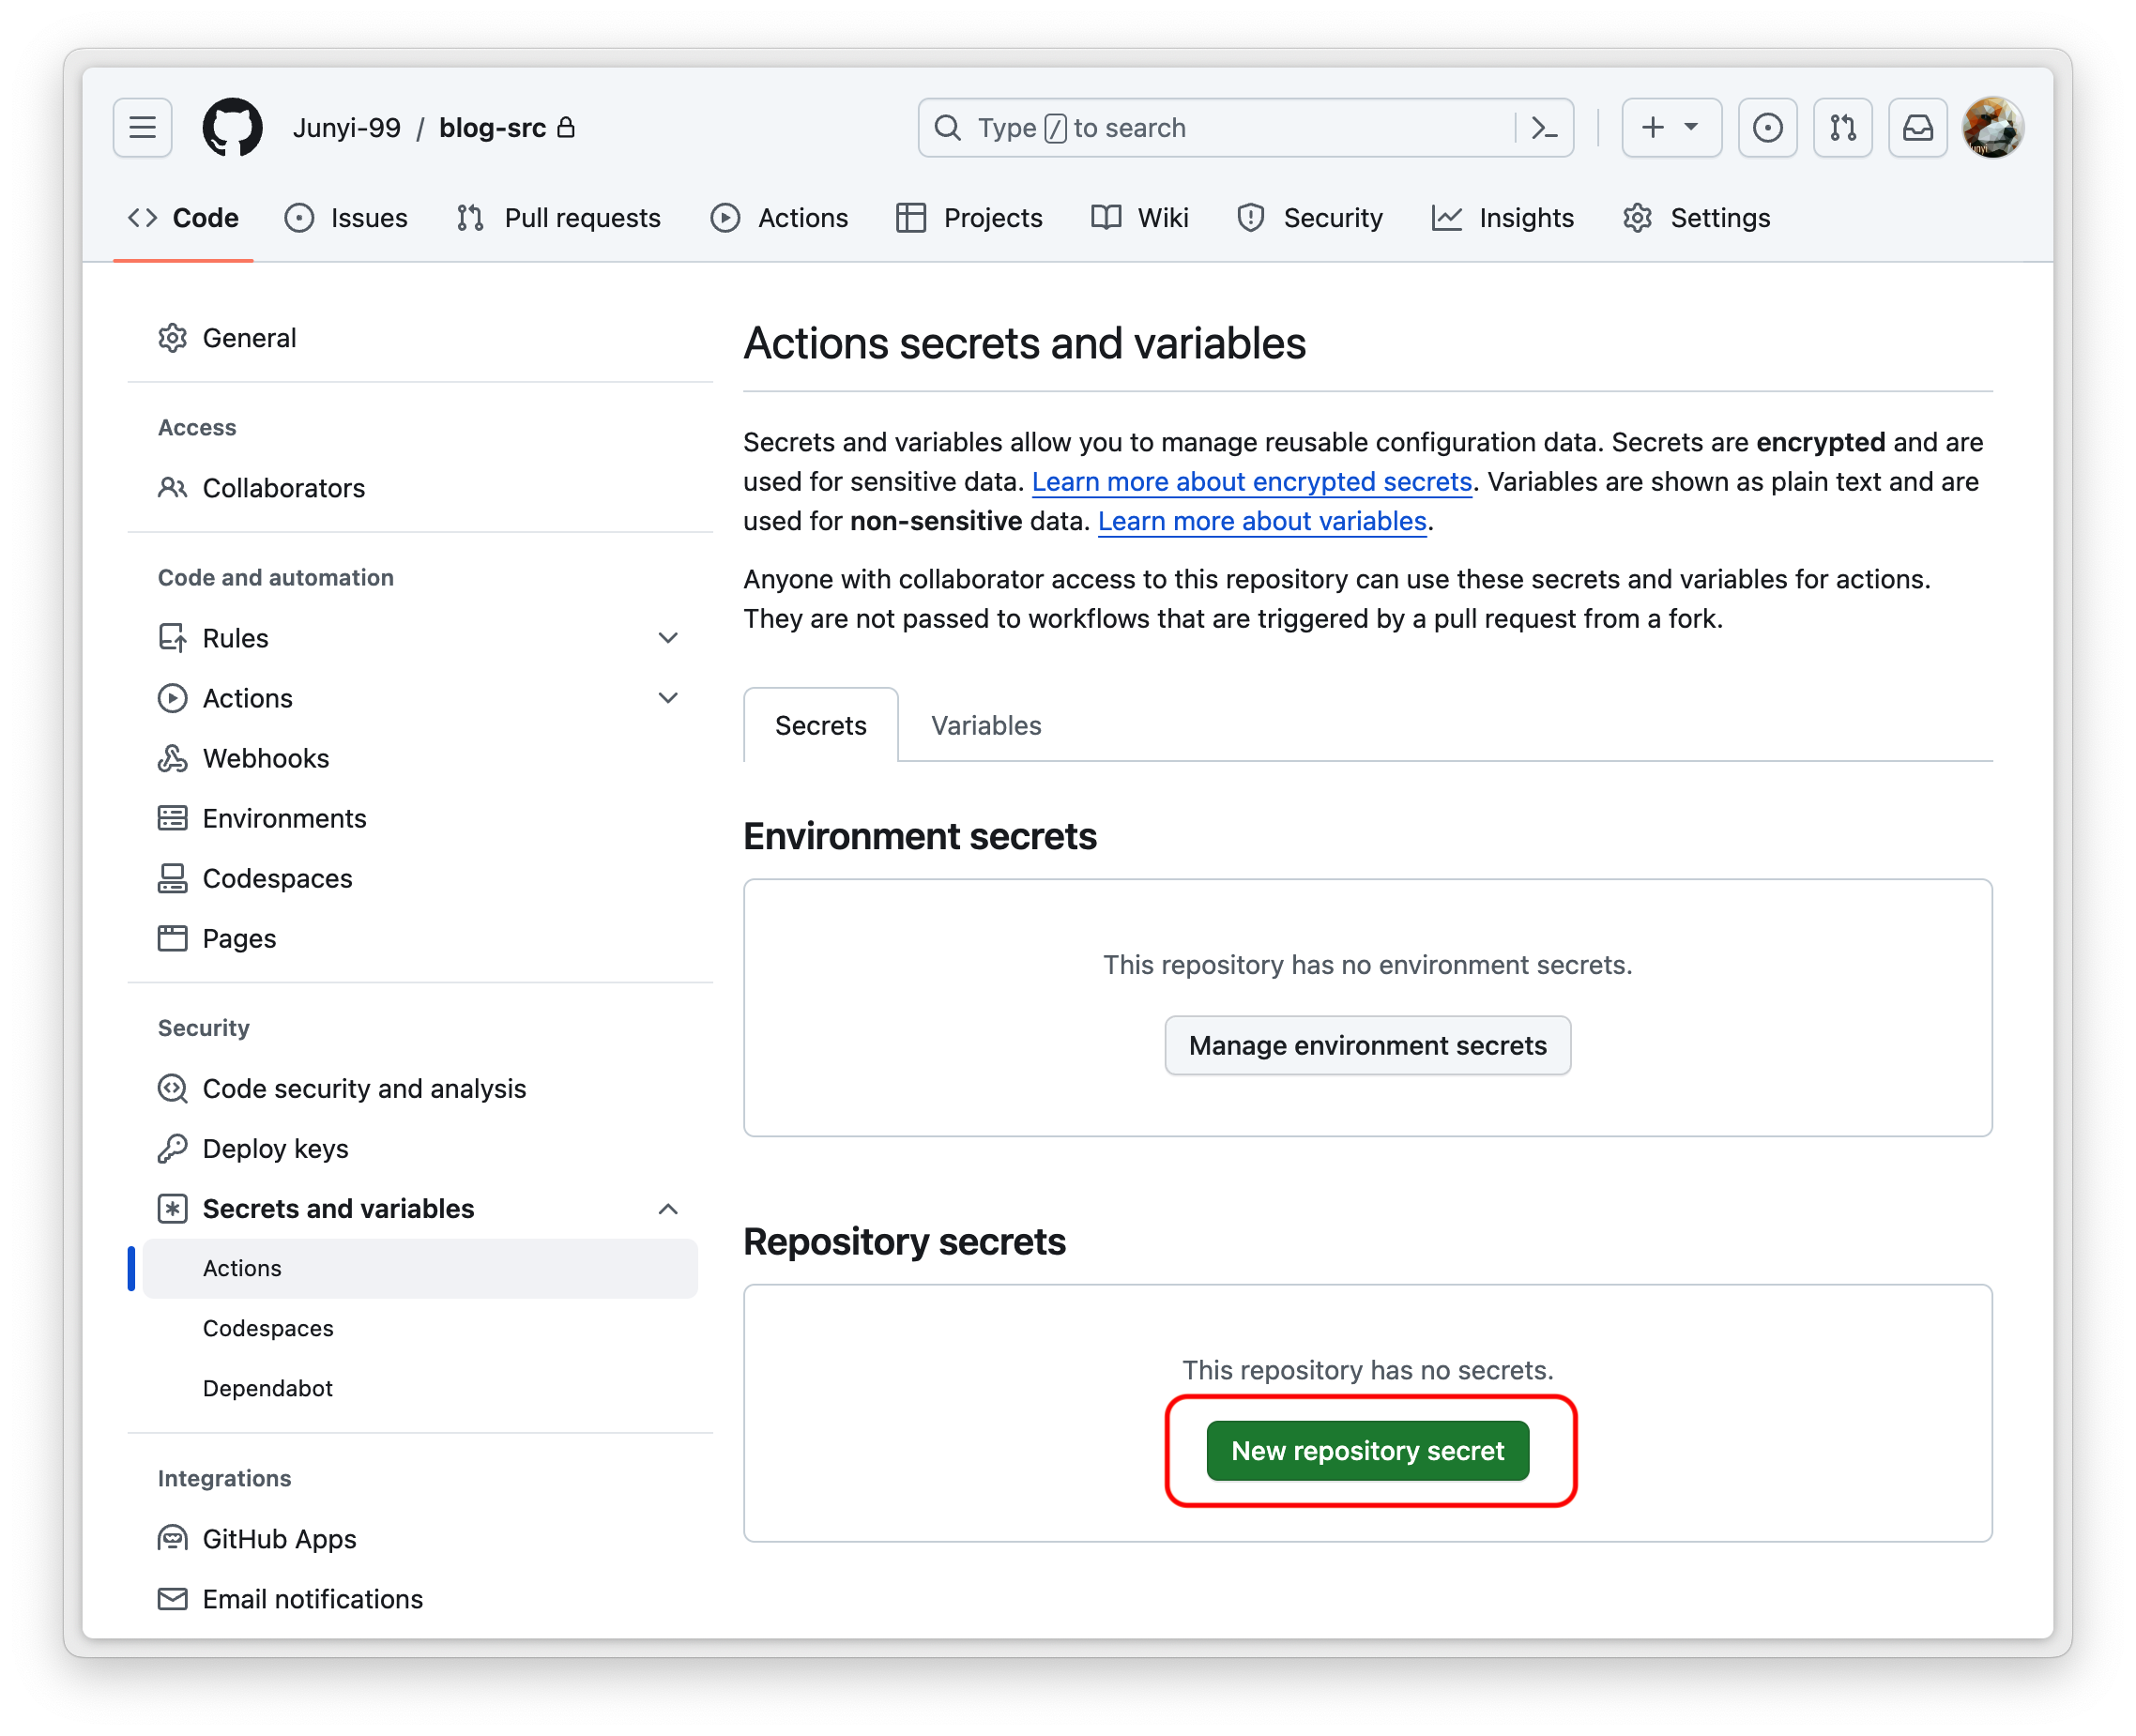
Step 2. Create a repository secret in blog-src
blog-srcThis repository contains the source code of our website and a GitHub Action.
So we need to set our personal access token (generated from Step 1) as a repository secret, to support the GitHub Action procedure.
Go to blog-src ➜ Settings ➜ Secrets and variables ➜ Actions ➜ New repository secret
#
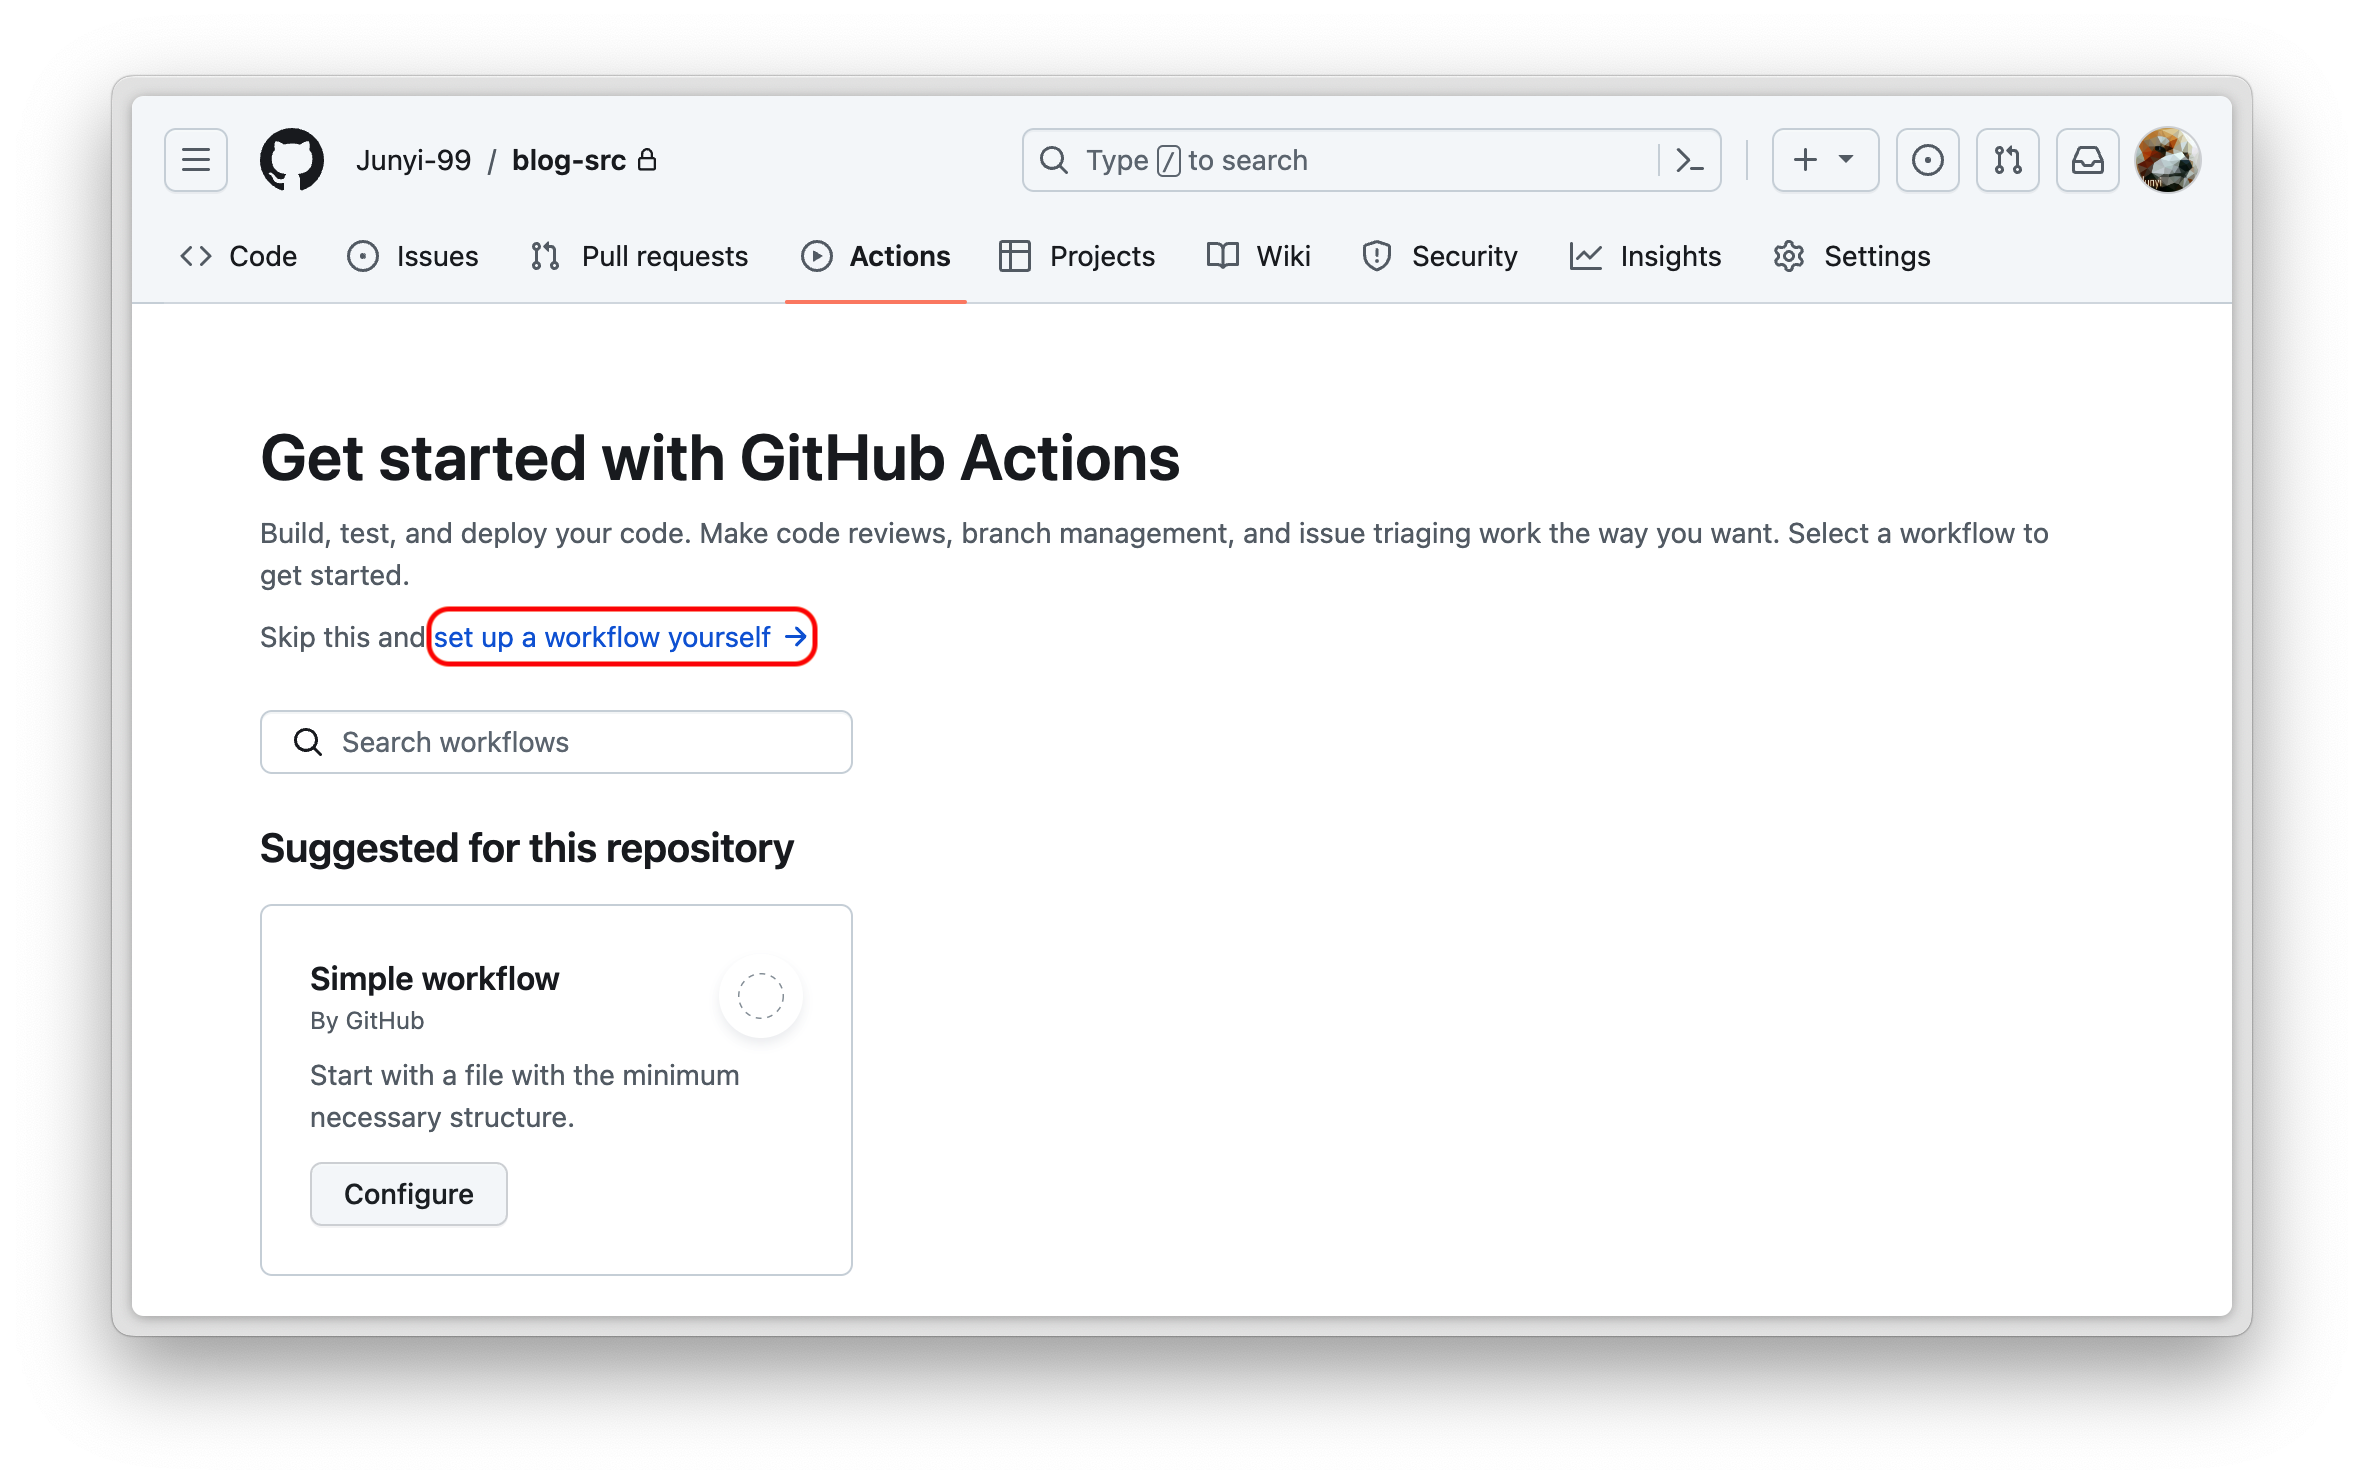
Step 3. Set up a workflow for blog-src
blog-srcRepository ➜ Actions ➜ Set up a workflow yourself
You need to learn how to write a workflow, here are some documents you can read:
Carefully design your workflow file, here we give you an example:
# main.yaml
# A Sample workflow for building and deploying a site to GitHub Pages
name: Deploy Website to Pages

on:
  push:
    branches:
      - main # Triggers this workflow whenever there's a push to the `main` branch

  # Allows you to run this workflow manually from the Actions tab
  workflow_dispatch:
  schedule:
    # Runs at 00:00 UTC every day
    - cron: "0 0 * * *"

# Sets permissions of the GITHUB_TOKEN to allow deployment to GitHub Pages
permissions:
  contents: read
  pages: write
  id-token: write

# Allow only one concurrent deployment, skipping runs queued between the run in-progress and latest queued.
# However, do NOT cancel in-progress runs as we want to allow these production deployments to complete.
concurrency:
  group: "pages"
  cancel-in-progress: false

# Default to bash
defaults:
  run:
    shell: bash

jobs:
  build-and-deploy:
    runs-on: ubuntu-latest
    env:
      YOUR_ENV_HERE: 0.1.2.3
    steps:
      - name: Checkout
        uses: actions/checkout@v3
        with:
          submodules: recursive
          fetch-depth: 0

      - name: Build my website
        run: |
          echo "Building the website ... (Remember to replace it with the real command!!!)"

      - name: Deploy to GitHub Pages
        uses: peaceiris/actions-gh-pages@v3
        with:
          personal_token: ${{ secrets.GH_PAGES_PAT }} # The pre-defined secret in Step 2.
          publish_dir: ./public  # Content in this folder will be pushed to the target repo.
          user_name: 'github-actions[bot]'
          user_email: 'github-actions[bot]@users.noreply.github.com'
          external_repository: Junyi-99/blog.github.io  # Your GitHub Pages Repo (target repo)
          commit_message: 'Automated deployment from Repository blog-src'
#
Step 4. Push to blog-src
blog-srcAll you need to do in this step is push some commits to blog-src, and if all goes well, your GitHub Actions will automatically execute, build your site, and push it to the blog.github.io repository.
(END OF THE POST)